
Dimitar Pouchnikov Blender Architecture Masterclass
This is essential for speeding up the process of architectural design, as concepts constantly evolve, and instead of remodelling, the modifier-based approach allows continuous refinements without complex setups.
“Available”
This is essential for speeding up the process of architectural design, as concepts constantly evolve, and instead of remodelling, the modifier-based approach allows continuous refinements without complex setups.
File Size:3.7 GB
Dimitar Pouchnikov – Blender Architecture Masterclass
1 Getting Started and project setup
This chapter includes a quick getting started guide, UI overview, and a primer on mesh editing. You will also learn about essential free addons that are useful for architectural design, and further resources that can assist you with the design and presentation process.
2 Modelling the context and adding materials
In this chapter, you will create a context consisting of a road, curb, pavement, and grass/plot area. You will learn how to model the context by editing the base mesh with the help modifiers. The modifier-based non-destructive approach allows the expansion of the site to grow easily depending on the project’s and the illustration needs. You will also learn the fastest way of adding and editing materials. The material types covered are image-based and you will also learn how to create a basic procedural material for the curb.
3 Modelling the project
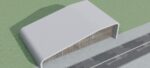
With a solid understanding of Blender and the context, the next step is getting into the core of the course – creating a concept building. You will learn to how to create the massing with the help of sketching directly in Blender. Once the massing is complete, you will learn how to create podium ground floor by creating the roof and the curtain wall. Then you will explore ways of generating the procedural tower with the help of the array and mirror modifiers in a way that allows for further adjustments.
Throughout the process, as many modelling steps as possible are done non-destructively with modifiers. This is essential for speeding up the process of architectural design, as concepts constantly evolve, and instead of remodelling, the modifier-based approach allows continuous refinements without complex setups.
4 Modelling refinements
In this chapter, further details will be added to improve the sense of scale of the building, and add examples of the types of activities implied by the building’s program. In the process you will learn how to work with external asset resources with free addons that link to the respective free cloud asset libraries.
5 Rendering basics
With the core modelling complete, it is time to delve into presentation. The best concept in the world may not be appreciated if it isn’t presented well. In this chapter, you will learn how to set up camera views and expand on the knowledge already built on generating materials from Chapter 2 (Modelling the context)
6 Rendering with Eevee
Here you will learn all the necessary settings to render well with Eevee, Blender’s real-time rendering engine, including tips on when Eevee is the best to use. Also learn how to create a simple camera flythrough.
7 Rendering with Cycles
In a similar fashion as with Eevee, you will learn the important settings to create great renderings with Cycles, Blender’s ray-tracing engine. You will also learn how to insert 2d backdrops and how to modify them to increase the scene’s depth without adding too much additional geometry that would require the more endearing time
8 Geometry nodes
Geometry Nodes are Blender’s answer to Grasshopper and Houdini for procedural modelling. The toolset is new, exciting, still greatly evolving, and presents excellent new modelling opportunities for architectural design. In this chapter, you will learn the fundamentals of using geometry nodes by adding shrubs, creating an attractor based grid wall, and creating a perimeter wall. Mastering the fundamentals will allow you to expand on the potentials for creating more intricate architectural designs.
9 Further rendering refinements
Creating renderings that illustrate the project typically requires many tweaks, adjustments, and further refinements. In this chapter, we continue to refine the materials, rendering settings, and the environment. In particular, you will learn different ways of adjusting glass materials to make them fit well with the project and the scene.
10 Rendering and post processing with Blender
Once all the refinements are complete, the scene is ready for a final render with Cycles and you will learn how to post-process the rendered image with Blender’s compositor. You will also learn why and when it may be useful to use Blender’s compositor for post-processing.
11 Post Processing with Affinity Photo
Affinity Photo is currently the best budget friendly alternative to Photoshop, as it provides robust photo editing capabilities with more adjustment layers than Photoshop provides. Here we will go through the process of post processing the raw image in Photo, taking into account the all useful settings that can help push the fidelity of the rendered image
12 Post Processing with Darktable
Darktable is an open source alternative to Adobe Lightroom, it provides many settings that are highly useful for post processing rendered images. You will learn how to use Darktable to post processs your images.
—————
“NOTE: The content above has been rewritten by our library.”
“To read more original content please visit here. Powered by Dimitar Pouchnikov .”